Semi-Hydroponic Setup for Succulents
Is there a hydroponic way to care for succulent plants?
The Difference Between Hydroponics and Semi-Hydroponics:
Hydroponics is a well-known system of growing plants without soil. Instead, everything the plant needs (oxygen, water, and nutrients) is provided to the root zone via a carefully crafted nutrient solution. Pumps and aerators circulate the oxygenated solution to the roots. This soilless system is exceptionally efficient and gaining popularity with indoor container gardeners. Semi-hydroponics is a simplistic variation that helps take the guesswork out of watering your plants. Unlike active systems where pumps deliver the nutrient solution to the roots, in semi-hydroponics, the plants are grown in an inert substrate, and water is wicked to the roots as needed. This is considered a passive method; it requires no pumps, reservoir tanks, or complicated moving parts Orchid growers developed this method of growing plants, but other plants with low water requirements thrive in the system. It works very well for succulents, preventing the downfalls of overwatering.
******
Benefits: It can be challenging when growing succulents to give them the right amount of water. While they like their growing medium to stay on the dryer side, they need the proper balance between too little and too much moisture.
1. Readily Available Moisture: Regardless of their watering needs, all plants experience drought-stress when moisture is lacking or only available intermittently. Many succulents experience this and grow slower than usual when potted as houseplants since people fear overwatering. When grown in a semi-hydroponic system, they grower faster since they always have moisture and nutrients quickly available.
2. Reduced Stem and Root Rot: Overwatering is a common mistake and occurs when plants are watered too frequently or given too much water at any given time. When overwatered, plant roots are more susceptible to root rot as toxins accumulate due to a lack of oxygen. In a semi-hydroponics system, air circulation is abundant within the root zone. Therefore, it is nearly impossible to overwater, significantly reducing the chances of root rot.
3. Fewer Pest Problems: Pest problems are a significant headache when container gardening using potting soil. Many homeowners experience fungus gnats, spider mites, and other insects in overwatered plants due to the high moisture. Eliminating the potting soil results in very few, if any, pest infestations.
******
Disadvantages: The disadvantages associated with using semi-hydroponics are relatively minimal but warrant mentioning.
1. Requires a Particular Growing Medium: One of the critical components of this system is using an inert medium that is chemically inactive. This eliminates potting soil, peat moss, and coconut coir. Many growers opt to use lightweight, expanded, clay aggregate (LECA), an inert substrate that is readily available and relatively inexpensive.
2. More Labor Intensive When using potting soil, the organic matter breaks down over time, delivering nutrients to the plant. Since the medium used in semi-hydroponic setups is inert, it does not provide any essential plant. Every time your plant needs water, it will require feeding with a dilute fertilizer solution.
******
Setting Up a Succulent in Semi-Hydroponics: This system is not difficult to set up, nor is it expensive, but it does have a few more steps than traditional container gardening. The result is a container with drainage holes on the sides instead of the base; this creates a reservoir in the bottom that wicks fertilizer solution up through the growing media to the roots.
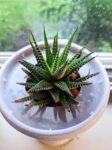
1. Find an appropriate container: It’s best to choose a tall, narrow container, instead of a short, wide container, to keep the roots up out of the water. You can choose glass or plastic based on your preference. I prefer using plastic, cylindrical take-out containers since they are inexpensive, efficient, and easy to drill holes in. A bonus is these containers have a lid, which I use to maintain higher humidity.
2. (Optional) Paint the container: I take the time to spray paint the containers I use to prevent light from reaching the nutrient solution. The paint helps to prevent algae growth. But they are many hobbyists that prefer clear containers to monitor the water levels carefully.
![]()
3. Drill two holes in the sides of the container. Using a handheld drill (make sure to use an appropriate bit if the container is glass or ceramic), drill two holes into the container’s sides about 1.5 to 2-inches from the bottom. Use a ruler to ensure the holes are spaced at the same height, keeping in mind the height determines how frequently you re-water.
4. Prepare the growing medium: Lightweight expanded clay aggregates (LECA) are the most commonly used growing media. They are incredibly porous and will wick water from the reservoir in the bottom upwards to the roots. Even better, they are inexpensive to purchase and can be reused. Before potting your succulent, clean excess clay dust from the pellets. Rinse the pebbles in a colander with clean water until you no longer see orange-ish particles coming off of them. Soak the LECA in fresh water for 30 minutes or more, and then rinse them one final time. Put these LECA pellets into the container until the container is filled roughly to the three-quarters mark.
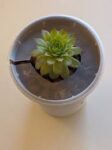
5. Plant Re-Potting: For many, this is the most challenging step in the process. Carefully remove your plant from its container, making sure not to break off or damage any roots. Using your fingers, gently remove as much of the potting soil as possible. When you have removed the majority of the growing medium, rinse it lightly under running water to remove any remaining soil. Place your plant in the container and add more add LECA around the roots until the container is full. Periodically shake the pot, so the pellets settle, filling any gaps.
6. Cut a hole in the container’s lid: Lastly, using a pair of scissors or box cutter, cut a slit and a hole in the lid to place the lid on the pot around your plant. This allows for a higher humidity level within the container and prevents the water from evaporating quickly.
******
Caring for Your Plant: Now that your setup is complete, watering becomes much simpler. Depending upon the ambient heat and humidity in your home, you will water your succulent every 1 to 2 weeks.
1 .When the container is dry, set it in the sink or bathtub and quickly fill the container using a fertilizer solution diluted to one-quarter to one-half the recommended strength until it reaches the top. This saturates the medium throughout. The excess fertilizer solution seeps down to the drain holes, leaving only a small amount at the bottom as a reservoir.
2. Every four weeks, flush the LECA pellets with clean water to rinse out any accumulated salts before adding the fertilizer solution.
3. Once the excess solution has drained out, set your arrangement near a window that provides adequate lighting, or put it outside if the climate is conducive. If it rains, the excess will drain out the drainage holes, and it won’t change the concentration of the fertilizer solution enough to cause concern.
Give It Time!! Following the initial transplanting into the LECA, your succulent will grow slowly as it adapts to the new environment. Don’t worry, as this is entirely normal! In about a month or so, you will begin to see new roots develop, and your plant’s growth will take off if it’s receiving the appropriate amount of light.